Mapping
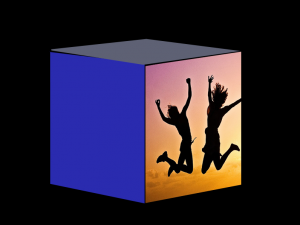
Mapping means overlaying an object with a visual texture in such a way that it matches the available surface perfectly. This allows to create various optical illusions that make the object ‘come to life’ for a viewer, for example an object seems to be moving, shrinking, changing, crumbling and the like, but it of course is only the projected surface material that changes.
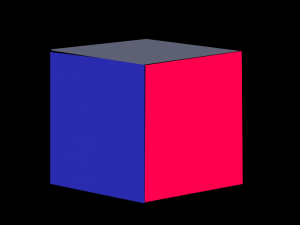
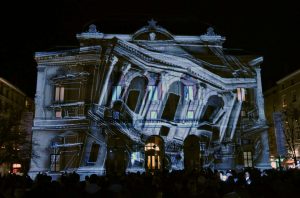 The basic idea behind ‘mapping’ is that the projection image initially spills over the object into the environment surrounding it. Then we map out the areas where we want visual content, which also means we project black colour (=no light) into the other areas. With precise mapping, it appears as if the projected textures are one with the objects they overlay.
So after a site visit and with projection and object positions established, the next steps are to recreate the projection object within a software programme, and map its surface areas. This will allow you to test out visual content within these areas.
Basic 2D mapping
To accomplish a basic 2D mapping you need to connect your projector to your computer, turn both on and in your system preferences tick off “mirroring” of screens. Then start up your chosen software and make sure both screen sources are available. Use your computer screen to run the main software application window and select your projector as a second window.
Arrange your projector so its projected image (=second window) falls onto your object*, and move the mouse into it so it now shows in your projection (you may find the arrow is replaced by a cross hair). Looking towards the object, mouse-click your way around the object’s corner points. This will draw a 2D shape in your second window. Visual content will only be displayed within this shape. Having set the mapping up at the beginning of a project allows to create content independently from location.
*If you cannot work on site, load the photograph you took during your site visit into window 2 and mouse-click your way around the outline.
Mapping off site
Especially for larger or more complex objects it is possible to take a photograph of the object from where each projector will eventually sit when showcasing the work. The photo will make it easier to interpret the 3D surfaces on the object as 2D shapes. Having imported the photo into the projection mapping software it can be used as a template to roughly map out the surfaces you will use. Due to camera lens distortion, this photo method is not very precise.
However, in the early stages of a project it is not vital to get the shape and size of the mapped areas spot on. A fairly good approximation allows you to test out content quickly. Later on you will need to fine-tune your mapping areas point by point anyway, to make the projection areas fit their 3D objects properly, creating the desired immersive effect.
Perspective distortion
A projector can only throw visual materials onto surfaces it can ‘see’ from its point in space. Depending on the geometry of the object and the projection angle, the visual content within these areas may appear perspectively distorted, and so the visual materials you will use need adjusting as well to complete the illusion.
For example a simple cube with 6 equal-sided surfaces: a single projector can only illuminate a maximum of 3 sides. As we turn the cube in the projector beam to find our ideal look, the 3 equal sides become quadrilaterals.
Once all the different surface areas have been mapped out, it is useful to colour-code and name each area before going any further. Also useful to consider:
- Complex objects with lots of smaller areas (metal girders) or rounded objects (spheres, human bodies, faces) may take more time to map than simple rectangles.
- When using more than one projector, you need to plan out how you will eventually blend the images together so it all looks seamless, as if the projection came from a single source.
3D Mapping
One way to start 3D mapping involves recreating the object as a 3D model in the computer, and then to ‘unwrap’ its surface areas so they become a flat surface map. This UV map can be exported. The areas on the map can then more easily be ‘painted’ with visual or moving image content. Once the 3D model and its map have been imported into the projection software, the prepared surface map can wrap around the object once more and the illusion should be fairly seamless.
Again a single projector can only throw visual material onto surfaces it can ‘see’ from its point in space, so some surface areas may remain dark, unless the project employs several projectors, potentially achieving a 360 degree mapping. Since more resources are needed, for kit and image processing, it quickly goes beyond our theme of starting projection mapping on a budget.
More thoughts on mapping
2D or 3D mapping? This depends on size and complexity of the project as well as resources available. 2D is usually faster and cheaper, since we are not rendering 3D features onto real-world objects. Starting in 2D is useful to gain experience and learn about limitations. With some software (e.g. Adobe After Effects) it is possible to create a 2.5D effect, by defining the z-axis of mapped areas and extruding the shapes. Using lighting effects we can then see shadows move across the object’s features. When working on a budget, CPU and graphics card may not be able to deliver high quality 3D effects, so then 2D remains the only realistic option.
Use mapping presets: For a stage setup at a venue or an annual projection event onto the same building, re-using mapping presets makes sense. Having information such as geometry and projector locations stored in the software means somewhat less work each time, although the new content material still needs to be prepared and rendered.
Documenting early experiments: For early practice tests (not at final resolution), an easy way to record video on a Mac is with the built-in QuickTime app. Open your applications folder to find QuickTime. Once it’s open, go to File > New Screen Recording and then click the Record button. You can choose between recording a portion of your screen or the entire screen. You will need to record audio out separately.
